
May 27, 2011. De-hibernated Spock and it said the usb/serial connector was faulty. I did a cold boot, and the message did not recur.
Did 'cold start' since scope was manually put into CW down position after installing new dec motor. I zero'ed the Gemini model, then loaded the march '11 model. then in C2A clicked on Regulus and sent the scope there. It was about 5 degrees east of Regulus. I clicked on a star about 5 degrees west of regulus, and Regulus showed up in the finder TV screen, and I centered it and synched in C2A, then told vhp to 'synch at current coords' and the bullseye immediately shifted to the star 5w of Regulus which I'd nominally sent it to. So, C2A isn't sending the synched coordinated to Gemini somehow. I then tried changing the jnow/j2000 options around but that only made for an additional error. Best to keep C2A and Gemini expecting jnow for all communications. One solution for mis-placed bullseye is to send it to a bright star on the gemini object list and then call up that list and do the synch there. After that, can just move object to object as long as you don't cross the meridian. It went to ngc 5425 and its supernova quite accurately, off by barely a CCD width.
May 29, 2011. Did 'warm restart' and sent it to Regulus, and it hit on the bullseye. Stayed entirely on the west side of meridian tonight, and all go-to's were very good, about a CCD width off or less. Solution to the bullseye issue - Once you tell C2A to go to a star, you center it by only using the VHP arrows, do NOT short-cut by sending it to a different nearby object to eliminate the error; that only stores in C2A the wrong coordinates which are then sent to Gemini. If you only use the arrows to center, then you can indeed re-synch in C2A and then in Gemini and it'll all be good, and the bullseye will stay dead-on your target.
Tonight imaged 3x5min the new NGC 3972 SN Ia. Becky Snow accompanied, and we both agreed that the SN was brighter than just two nights ago. Great! We got it pre-max, and so if I can keep imaging, I can get a set of images out of which I can make a cool new lab for Astro 8A. I let Becky take 3 images of the Sombrero M104, then she left and I did one 5min image of NGC 5425's supernova (very dim V=16? and too close and inside the flat disk to hope for any photometry anyway. No other SNe looked good on the latest list. Finished up at 1am with 3 images of Comet Hill, at V=13.2, showed a slight tail, unimpressive but definitely a comet, near Polaris. Then fog came in. Also made 6 more darks at T=-21 and made a 9-set median of all T=-21's. Still need to combine all the flats, but didn't have luck finding a cookbook online. I think it just means dividing by the median for each to normalize, then median combine.
June 1, 2011. Did SNIa in NGC 3972. No alterations of the Gemini model
June 16, 2011: Met with Erin G and imaged supernovae in NGC 3972 and M51. Left at 2am. Early image was still troubled by frost, but this quickly disappeared since I re-installed the dried dessicant right before imaging.
June 20, 2011: No imaging, but I did install the mirror lock bolt.
June 23, 2011: Met with Erin before twilight. As it got dark, we made a new Gemini model. I realized during twilight that the Arcon WWV radio clock does NOT have proper time; it's about 45 seconds off. This may be why the bullseye kept jumping after synching on a star. Now, get WWV time online to synch time on Spock. I also realized that Spock knows we're in daylight savings time, and so keeping Spock on standard time was a big mistake. It made for a UT that was an hour off, compared to the March Gemini model. Therefore, new procedure - always set to true local time on Spock and therefore on C2A. So recalibrated the clocks, manually unlocked the axis clamps and roughly put the scope at CWD position, and started up in 'cold start' and made an entirely new model. Not that many stars yet; maybe 5 per side, all over the sky. So feel free to add more stars next time. But it's already working well! Now the target star is on the TV screen even after a meridian flip. The bullseye now stays put on the star after 'add to model' click.
Following this, Erin and I did more imaging of SN Ia in NGC 3972, and M51. It's been a week since installing the newly dried dessicant, and no frost appeared.
June 27, 2011: Made the 9 flats called "0122" into a master median combined flat. Used histogram to find average, divided through by average and multiplied by 10000, so avg of calibrated flat is 10,000 counts. Then median combined these 9 e.g. 0122-1s etc. into master flat. Emailing it to myself so can download on next visit to observatory. Verified it is indeed smoother than any individual flat.
Oct 26, 2011: Lots of no entries since June... sigh! Anyway, did more dark frames, at T= -28C, and -25C. 9 darks total, and medianed by 3's, then the 3 medians I averaged.
Nov 2, 2011: Astro 9 imaging. I noticed that one pointing wasn't that good; off by more than a CCD FOV by a tad. So I added another point to the model, and the next pointing was very good. Also noted that the outdoor ST2000xcm developed frost, even though I'd baked it a month or so ago. Need to bake the desiccant again. Also got straight on how the finderscope TV view, C2A, and the CCD imaging frame all are oriented in west vs in east. I need to also get clear on where the tracking chip is, so I can more efficiently put a star on it when needed for calibration.
Nov 5, 2011: Spent the night at Observatory. Baked the desiccant for the ST2000xcm outdoor camera. Noticed the canister had no "o-ring" and so took the o-ring from the 12" case's dummy. Baked the dessicant at over 400F all night. Hope I didn't melt anything. I'm not sure I didn't. Tried to get CCDSoft working, but even w/ latest drivers and latest CCDSoft update, the ST2000xcm camera does not appear on the camera list in 'setup'. Selecting instead the ST2000xm camera it will still control and talk to it, but no color controls are available, so would have to do further processing in CCDOPS it seems.
Nov 15, 2011: Astro 8A night at the observatory, including a shot of M33 for Max. Abandoned CCDSoft for now. Should try to use MaxIM/DL CCD as Ron Yelton has done. Integrating focusing and automated saving would be big advantages.
Jan 5, 2012: Mount model somehow went bad. Perhaps during student use during the recent asteroid occultation(s) when I was outside for long periods. The symptom was pointing being off (essentially due east or west) by up to a few degrees after doing a meridian flip. I tried loading an old model but did not help. I tried re-synching but it didn't help. Finally, last night I just built a whole new model from scratch (labelled jan5-11.gp in Gemini), after making sure the mirror stabilization bolt was still installed and loaded by the spring. Even took it off and put it back on. The meridian flip issue was still there while building the model, but after a few hours and dozens of stars on both sides, the pointing at least got the target reasonably inside the TV finder FOV. Pointing on the same side of the meridian after a 'synch' is quite good, well inside the CCD frame. Focus was off too, until I re-installed the mirror bolt. Now focus looks good again, even w/o changing the actual Moonlight positioning. Still need to query Moonlight about installing a beefier spring. Also, I looked at the new 10pos filterwheel and to mate with a camera lens for photometry work for transits will require another $234 for an adapter which bolts to the CFW10 to accept a Nikon lens. Will get approval and order it.
Had successful asteroid occultations Dec 21 and Dec 30, with Gene and Duncan getting imaging on the 12". On Jan 5, Gene did darks and bias frame acquisition on the other ST2000xcm for modelling temperature behavior using formulae modelling quantum behavior of silicon. An interesting project.
The Kendrick seems to have gone bad. I've noticed mirror fog happening and last night noticed the power cable was disconnected. I plugged the banana plug back into the unit and it felt hot where the cable connector came in. The 'on' red light on the Kendrick glowed brightly when this resistor cable was not connected, but was much dimmer when plugged in. And soon, it was off altogether. It smelled like something burned out. Will have to pull it apart to diagnose.
Jan 12, 2012: The current mount model seems to be able to target things to within the FOV of the finder scope, but not much better. Gene imaged the Running Man Nebula, and also the M46 cluster and planetary. Meanwhile, I worked on my laptop, and then after he left at 11, I imaged asteroids Perseverentia and Piazza, and then tried the asteroid occultation (a miss). Also, I found in the side storage area something I knew we had - the original bolt and spring used to stabilize the 12" mirror before the new building was put in. And this bolt has not one spring and a spacer, but instead has two springs, and they are much stiffer springs. This suggests to me that we simply need a stronger spring constant to stabilize. So for the next projects: Install old bolt/springs, and also take apart the Kendrick power distribution box to diagnose.
March, 2012: Got a new heating element, from Orion, and tore out the Kendrick unit. The new dew strip simply replaces the Kendrick heating element and plugs straight into a 12v power supply, such as the Kendrick power supply. Seems to work fine.
June 7, 2012: Did a series of Gemini mount models, but not happy with any of them. Mirror flop I believe is one problem. The other is that it's too easy to click on a bright star in C2A but yet at large scale, you'll find once you zoom in that C2A actually picked a nearby deep sky object and not your bright star. If you don't explicitly tell C2A again that you're going to that star, it will have the coordinates of the deep sky object and when you 'synch', you'll be doing a bad synch. This will wreck the model and there's no way to take out the last addition to the model. You have to start from scratch. You need to get into the habit of saving the model each time you add a new star successfully, and do NOT save the model until you are sure you did the last star synch correctly. That way, if you mess up, you can reload the model you were building since you will not have re-saved over it. Also, I've found the bolt and screw used on the 12" when it was on the fork mount, and seemed to prevent mirror flop pretty well. I'll swap that in, but first I wanted to wait till summer and have time to send off the Moonlight focuser to the manufacturer for upgrading the tension spring so that it'll hold the weight of the ST2000xcm during focusing. I boxed it up and sent it off on June 7.
June 30, 2012: I expect the Moonlight focuser to arrive any day now. Meanwhile, I am working on the foundation for the POD. Settled on exact dimensions and offset of the flooring relative to the pier. Set survey markers into the ground marking the corners of the 96" x 120" floor, and placed roughly the pier blocks. Still need to level them and fine tune the placement. That's the next work, later this week. The POD dome is due to arrive late this coming week. The foundation will likely not be ready, but I hope it will be ready in time for a July 14 work party where we'll assemble it. The flooring was bought, delivered by Karl and I a few days ago, and I painted it with the roof paint which I bought a couple of years ago. Two coats on one side. Then painting the other side the next day; two coats. Will do edge painting likely after installation
July 1, 2012: Got the north-south line of piers set and levelled, and the front (east-west) piers set and levelled
July 2, 2012: Half the pier blocks are now in. No word on the arrival of the POD. Perhaps not coming this Friday?
July 3, 2012: Finished levelling and setting the flooring pier blocks. Cleared lots of weeds and tree branches near the picnic table.
July 5, 2012: Cut the 2x4 treated wood to make the joists and connectors. I used angle steel connectors to fix the 10' 2x4's to the pierblock wooden tops. I'd bought two extra 10 footers to replace the two which had twisted too much after sitting around. After setting the 4 10 footers in the north-south direction pierblock lines, I then measured individually each cross piece and cut each one individually and set them, which worked out well. I had to use a few pieces of scrap and chippered wood lying around to get all the 2x4's to have the same top surface for the flooring. Got all the joists done. Ready now to lay on the flooring. The 1 1/16" flooring 4x8ft plywood pieces are too heavy for me alone to handle, so that'll wait for the work party, which now is set for July 14 Saturday. That was a LOT of sweaty work. Looks like the POD will not be arriving this week, as it's already thursday and no word for Friday delivery.
July 13, 2012: Got word, POD is showing up today! Arriving on 50' truck, from Old Dominion Freight Lines out of San Jose. No way they can get up our road, so I instructed Torres in the Cabrillo Warehouse to bring the boxes to the observatory and where to set them. Big snag - they only brought two of the 4 boxes! I explained forcefully to John at Old Dominion that the ONLY time I could get together the work party to put the POD up was tomorrow. We NEED to get those last two boxes here, immediately! I was gratified that he decided to load the last two boxes onto his personal pick up truck and drive them through rush hour traffic from San Jose. I thanked him of course, and said I'd be there at the observatory waiting for him and help him offload them. Took 3 hours before he arrived, but he made it, and we've now got all the POD pieces (except the PZT)
July 14, 2012: Workparty to install the POD. Karl, Mark Meacham, Duncan Pairman all arrived. Duncan first, at 2pm, and Karl and Mark about 3pm. Mark brought the steel mount platform he'd been working on and welding up for us. Beautiful work! We set it on the bolts of the telescope pier, penciled onto a board how to orient and drill the bolt holes and the scope mount holes, and Mark plans to drill them at home later. We got the flooring lifted and set, the tongue/groove mated, used a chalk line to mark where to drill through to the wood on top of the pierblocks. Karl and Mark set the walls, although later on we had to re-do as the wall height wasn't very level, and the door piece in particular had an extra shoulder which prevented gettin a washer on it. Swapping the adjacent wall piece with another one which for some reason didn't have the shoulder, solved the problem. The two dome pieces per dome half were weatherstripped and bolted together. Then, we realized we hadn't taken the time to figure out how the domes really worked together, and the instructions were not written and included in the boxes like I assumed. Instead, they're visual DVD, and our "Spock" doesn't have a speaker! It was late, and we'd need one more day to finish the job. Great work, guys! Thanks for all your help. Sorry our BBQ man couldn't make it. We'll get together one more time, soon, and celebrate the completion properly!
July 17, 2012: Tue afternoon and I arrived at 2pm, and Duncan soon thereafter. Mark and Karl never did make it. However, Duncan and I were able to get it all done by ourselves, by sunset. Got the metal plates on the primary done drilled in, readjusted the bolts holding the domes together to make sure the metal plates fit correctly. I'd watched the videos again and realized the domes halfs operate like a clamshell. Duncan and I lifted and set them, rotated them around. Tried to circularize the walls but always seemed to leave it out round. Still, it works as is. Haven't lag bolted the walls to the flooring yet; will do that when I'm satisfied it's all as smooth as possible. Duncan and I also got the wood pieces for the shelf drilled and set. A solid day of accomplishments.
July 20, 2012: I worked alone and got the sliders installed, and the shelf mounted on top. Works great. Spent the night at the observatory; clear night and got the Moonlight focuser with the stronger spring, mated with f/6.3 reducer, installed with ST2000xcm camera. Verified that focusing now works in both directions, although it's still much quicker in one than the other. The spring or motor or both, are just barely adequate for moving around that ST2000xcm CCD camera. Noted that frost was on the chip window. So, to do before school starts: bake all dessicant cannisters on ST cameras. There was an asteroid occultation by Arsinoe which was very high probability for going through Aptos at 2:10am. Went to sleep at 12:30am under clear skies after testing a procedure for doing this very tough 11.7 combined magnitude object at 16 degrees altitude, just clipping the trees on the ridge towards the campus - Use the ST2000xcm CCD in a long exposure, and precisely set on and off the 'guide speed' motion to give a star trail. Works great! Remember for future very dim events. But, fog came in at 1:50am and got no data. Next morning, up at 5:50am for a 16 mile run with Ferrell through Nicene Marks . Great Day! Finished afterwards with post Wharf-to-Wharf party at Delucchi's.
July 25, 2012: Biked to the observatory, and just found and measured the existing carpeting we've still got left over from de-commissioning the old 8x10 shipping container observatory. The inside of the dome is just under 7 ft in diameter, and the carpeting is a little over 7 ft in diameter - perfect!
July 26, 2012: Rounded the sharp corners of the flooring. And cut a square piece of carpeting for the floor. I cut a 12" hole for the telescope pier. Will set and cut to fit inside when we have the dome completely circularized. Noticed that my sleepy brain, after leaving on the CCD camera and power supplies in hopes of quickly coming up to ready for the 2:10am Arsinoe event on July 21, had forgotten to turn off them off! At least I did park the telescope at 2am. But the camera power has been on for the entire 5 days since then. Still ran OK, so hopefully wear/tear was survivable. No damage that I can see.
Aug 1, 2012: Biked in and took delivery of the PZT hardware. Now in my office.
Aug 3, 2012: Tuned up the walls and dome positioning. Came up with a solution to closing the clamshell - cut a 10" length of 2x4 and place in the slot. Takes the weight of the secondary dome when closing. Also placed the carpet and started on cutting it to fit the circular outline.
Aug 5, 2012: bought new carpet cutting tool, 5 tubes of silicone sealant, 7 lag bolts for attaching dome to flooring. At the observatory, got 7 bolts (5/16" x 3") predrilled and then socket-ed into the flooring. 5 more to go, on next visit.
Aug 13, 2012: finished installing the carpet, cutting was much easier with the new knife. Screwed down at various points. Supervised installation of new LCD monitors for "Sulu" and the other CRT monitor at south end of the table. Installed speakers for "Spock". All this was after photo'ing the Venus daylight lunar occultation. Got mediocre pix.
Sept 9, 2012: Spent Sunday night at the observatory - arrived a bit too late to do twilight flats. Instead, wanted to make sure the 12" scope was ready to go w/o problem for Astro 8 and 9 this coming week. Found that despite leaving the scope in focus last time, the star images were quite obvious donuts. Required jog focus "out" to index position 1100. Focused well in both directions. Seemed to remain in focus throughout evening, as I imaged new SNe in NGC 1630 and NGC 1619. Then added more stars to the mount model, after starting the evening with a synch (off by about half width of finder FOV). Seems to point OK to all parts of the sky now, and saved mount parameters as Sep9-12.gp.
Sep 18, 2012: Did twilight flats, about 0.1 sec exposures on the North Star area, Polaris not in FOV. They seem to work OK. Did our first imaging sessions - for Astro 8A students. Telescope points well until meridian flip, then off by maybe 15'. Usable, if not perfect. Have not replaced the existing two-spring mirror mount tension bolt yet.
Sep 19, 2012: Did our first images for Astro 9 students. M57 for Becky, Iris nebula looks great. All seems to be working well. No frost or problems. It is important to turn on the Gemini last, as otherwise it cycles through all COM ports and cannot find the mount. Also, there is some gravity on the 12V power male/female connector next to the Gemini power supply, and you may flick on the Gemini computer but not have power. Verify you have power by seeing the red lettering come up on the hand paddle. Otherwise, you just can't get anywhere!
Dec 19, 2012: The mount model has been working fine, w/o the original bolt/tensioner. POD weatherizing has been a problem ever since the first rains a few weeks ago. Alcohol wipe+silicone doesn't work, doesn't stick to the polyurethane. Lexel sticks better, and seems to be working as far as weatherinzing the dome joints. The problem is the dome walls where they contact the flooring. Silicone, and Lexel, neither provided the proper seal. So today, Duncan and I pryed up the dome and applied 3/4" wide sticky weatherstripping to the underside of the dome walls, then set it back down. Rain returns tomorrow night. We shall see. A bigger mystery is that water seems to be getting into the inside of the dome shell itself, so that when I rotate the clamshell, water pours out of the hole near the pivot point.
Dec 20, 2012: Only one day to go (no, not till the Mayan-predicted End of the World, although I suppose that's there too), till the next big series of storms. So I biked out to the observatory to finish sealing things up - applied a fresh tube of Lexel to the bottom zig-zag's which join the wall segments. I have not bought the longer bolts and cinched down the building to the flooring, that'll be next, after it successfully passes the storm test. Also, bought a new power supply for the Meade 10" scope. Made by Sparkle, it's designed for notebook computers. 6.4amp 19VDC output, which is far more than enough, and has a right-angle plug which is essential to prevent the rotating fork from trashing the connector as happened with the last one. Already tested it, and it works fine. It came with lots of different sized barrel connectors, and one fit the 10" just right. It was $74 at Santa Cruz Electronics - pretty big price - but if it works and doesn't die like the last few, it'll be worth it.
Early Jan 2013: I've bolted down the dome again, in late December. Today I went out to check how it looked after the few tenths inch of rain the past 2 days. Small puddles under the holes in the secondary dome. However, I'd earlier noticed that the last couple of inches of the joint at the top of the primary dome wasn't Lexel'd, and thought this might be the cause of all the water into the secondary dome shell, and sealed it up. After the next rain, I saw no water in the bucket I placed under the secondary dome hole nearest the door - success (I think)!. I also bought more lag bolts and cinched down the dome further, but didn't have enough or enough washers to do every hole, about 1/3 are still open. I'm hopeful it may be sealed now, although I did see some water on the floor against the dome wall, looking like it had leaked under the wall perhaps. If I seal up more holes, perhaps it'll finally be sealed?? I've put in bolts in all holes near the two points showing possible leakage.
Jan 25, 2013: It's been dry, until 2 days ago when we've had maybe 0.2" of rain. I rode out today to see how the dome fared. Alas, water pooled at two spots; approximately under the secondary dome holes. I rotated the dome upward and got no water drainage, but when I rotated it back down, I did get water coming out the hole nearest the door. That's a probable source. However, it may also be water leaking under the dome wall in these areas. I did not have the bucket in place, so confident was I that that problem was solved. I've now placed two buckets; one under each secondary dome hole. However, no more rain is in the forecast through early February. Next time I'm out, and there's enough daylight, I should pry up the far side of the domewall and see if there's possible leakage through the spots where the weatherstripping has a discontinuity. Maybe place more weatherstripping there, and seal it with Lexel.
Checked out flooring; there's puzzle-piece flooring for ~$150, or roll flooring for $114 at Home Depot, in 8'x4' rolls - two of these would be perfect. Get big shears to cut it. It's thnner than the puzzle piece stuff, but thick enough to probably be good for equipment drops. Also bought another red light strand like we've got outside the storage shed.
June 30, 2013: Lots has happened, but I've neglected this log. Most important thing to note is - the 12" has horrible pointing accuracy after doing a meridian flip. I mindlessly tried on eve of June 28 to just make a new mount model and beat it into submission with more stars, but to no avail. What's happened to my memory?? Of course the problem is something I've promised myself to do for a year - replace the mirror lock bolt with the old one which I'd found in the back of the dome and used to be on it in the old days of the fork mount. That bolt has two springs both of which are stiffer than the one wimpy spring version that is on there now. It's got to be mirror flop. Do that, next time you're there, and then use an older mount model which you trust and it'll probably be fine. Another thing I 'forgot', is that you have to do more than just "load" a .gp file to have it go into effect, you also have then click the little crooked arrow and tell Gemini to send the mount model to Gemini. You've not been doing that.
The POD has been dormant. I've done nothing for months, as the rain kept leaking in. Go to Home Depot and price Trex and ponder replacing the wood painted flooring. The weather strip along the bottom that Duncan and I installed just isn't working. But a thicker version which has no breaks for the entire circumference, on Trex boards which have a natural (tiny) gap to let water drain away, might just work fine. It's July 1 tomorrow - new Fiscal Year and new infusion of money to spend on these things.
July 10, 2013: loaded freeware software which automatically synchs the computer clock on Spock to NIST time, and set the synch time interval to once per day. That should keep it quite close and we should not have to do it manually any longer.
July 17, 2013: st2000xcm died, it seems. To do - test the voltages on the 5 contacts from the power supply. Make sure they are all proper. If they are, it's probably in the camera. Swap out with the other st2000xcm. But don't try this UNTIL you make sure the voltages are correct. the easy way to do this is just use the identical cord on the other st2000 and test those voltages first and see if the dome's st2000xcm power cord gives the same. if so, it's in the camera and swap it out. Here is what happened - the connect between ccdops and the camera went away, and camera/setup failed repeatedly. All this while, the cooler/fan sound was normal and so power seemed fine. So I tried killing CCDOPS and powering off the st2000 power supply, then back on. This is the way it is done in the evening as per usual, and you hear the fan, then you bring up ccdops and it'll connect OK. But, after powering off, the camer would not power back on. The fan remained silent. I can hear a faint click as if a relay is being powered in the camera, and the fan moves a tiny bit, but that's all. The fan spins freely by hand still, and trying to power it and make it spin with a little push doesn't make it go.
Second issue. I replaced the bolt + single spring + spacer with the old bolt + 2 springs which has more spring force. I tightened the bolt all the way until it bottomed against the mirror cell. However, the stars were now quite out of round, as if perhaps the stars were now quite far from the optical axis. So, I backed off the bolt about 2 full turns and the stars then looked normal. I was optimistic the mirror would now be stable going across the meridian. I moved the scope to a star, synched it, and on the same side of the meridian, it pointed well. However, moving across the meridian it again was pointing east of the target by at least 10 degrees! I also had the experience that trying to go back to the other side of the meridian the scope just wouldn't move. Didn't even try. Parking at CWD down on the pole and then going to the other side of the meridian did work. Very strange, and just after this, is when I lost connect with the SBIG ST2000xcm camera in the first paragraph here.
July 21, 2013
Symptom July 17: The camera suddenly lost contact with the WinXP PC while being used on the 12" in the dome. The fan was still on, but when I tried power'ing off the camera and then back on, the fan would not come back on (i.e. would not talk to the computer).
Tried:
(1) repeatedly closing and opening CCDOPS to reconnect. Nothing.
(2) Maybe the power supply (PS) died? But the little green light on the PS was lit, so it clearly was getting power. The rest of the gizmos plugged into the same plug were working, so there's power coming out and into the PS. Just maybe inside the PS it die and no output? So, pulled off of camera and tested the voltages on the pins with the VOM. All read zero volts. Aha! Bad power supply! Now, did it damage the camera? Are you sure it's the power supply? Maybe it reads 0 volts "normally"? So, easy to check...
(3) Get the idential other 12VAC power supply and check it with VOM. Zero volts for all pins! What?? It's completely causally unconnected to the original PS. No WAY it could have died, except we haven't used it in maybe a year or almost a year.... Did it silently die inside it's case?? Maybe the VOM is batty?? Easy to check...
(4) Get the 12VDC power supply and test it's pins. They all read normal and healthy! So, the VOM works fine. So, now we have a good powersupply for sure. Let's connect up the second SBIG ST2000xcm which works fine last time we tried it last Fall.
(5) Put on the known good ST2000xcm with it's presumably good VAC power supply onto the 12" camera. So, the only variables are a new camera and new PS which worked last time we tried them.
(6) Connect it up, confident it would work and.... nothing! No connection to the computer. No fan comes on, little green light on the PS is on. Are BOTH 12VAC power supplies and / or ST2000XCM's now dead!?
(7) I KNOW the 12VDC power supply has good pin voltages, so connect it up to the 8" version ST2000xcm connected up to the 12" scope. THIS should work! And.... nothing. No connection to the computer, no ST2000xcm fan comes on.
(8) This is really getting puzzling. So, I sat down and drew out a diagram of every electrical connection coming out the computer and going up to the telescope. Checked all connections for loosness and they were all good. The USB booster was lit green as if it were happy. No kinks, nothing pulled. It all looked just fine. The USB connections to the backplane of Spock all looked snug.
(9). At this point, I thought the next thing to try was to go get my laptop from home and connect it up. Take Spock out of the loop. Before trying that, I thought I'd try something else which I had almost no confidence would work, which was to simply cold boot Spock. Maybe worth a shot, since after all, I virtually always 'hibernate' Spock instead of cold booting. Maybe this old WinXP needs to have it's pipes cleaned once in a while?
(10). Cold-booted Spock - turned on the PS for the camera... and it worked! The computer gave a little Windows USB marimba double tone, and the camera fan came on, and all was good! This was for the 8" version ST2000xcm. Good! So probably it'll work for the dedicated ST2000xcm for the 12", which I swapped back on (after doing a blow with the bulb on the window, which had a few spots on it. I did not try and alcohol-clean it). Got it put back on, and it too comes on just like it should.
Problem solved! Morale of the Story.... just like old time computer tech's advise so often - the first thing you should try is just power off and cold boot your computer system! I was SO ready for complex expensive issues that I gave no credibility to the easiest of solutions.
Now: Since the camera came off and back on, I need to make new twilight Flat Fields and do a new focusing before use.
July 22
News from POD. I should replace the metal nut with a nylon nut, on the POD pivot bolt, and tighten it down so there's no way for water to leak in. That could explain my issue!
"You can replace the acorn nut on the end of the bolt with a 1/2" nylock nut and carefully cut off the access thread/length with a hacksaw when the bolt is mounted in place. Even with the 6.5" bolt, for most, the acorn nut is more of a bolt cover and less of something which tightens the semi domes against each other. This happens naturally with the dome shapes. So we don't worry about pushing them together with a nut on the bolt. BUT if you have a gap between the semi domes and you get a drip there, replace the acorn nut with a nylock nut so that you can squeeze the domes together better for a better seal between them. If your domes feel really lose against each other when you open the Sec. dome., if there's little resistance, it might be an indicator that your domes could be closer to each other than they are. There should be some resistance from the domes interacting with each other. If it feels like there's none, tighten them together using the above instructions. On the outside of the dome, if the shoulder of your pivot bolt does not go all the way into the hole for it, use a 5/16" drill bit to enlarge the first quarter inch of the hole a little. Or you may be able top pound the bolt with a rubber mallet and it will enlarge the pivot hole a little so that it seats all the way in. But if that is starting to take too much pounding to do, don't. Drill instead, then pound a little. It's important that your pivot bolt goes all the way in. If it does not you can get water in there. If after enlarging the hole and/or pounding the bolt and/or YOU'D JUST LIKE TO HAVE MORE SEAL at the outside of the pivot, add a garden hose rubber washer (they are available at the hardware store for pennies) between the head of the pivot bolt and the dome skin. This will seal there real nice."
July 24, 2013
Idea - to put our tiny lens on a spare PC164C and mount it on the 12" so I have a wide-angle view of the sky for meridian flip's. When scope is off by ~10 degrees, it's a real pain to try and find/synch on a star. This should make that much easier. Will need some sort of switch to route proper RCA output to the TV monitor. Ask around at SC Electronics.
Feb 11, 2011 is a good mount model, according to my post on the yahoo users group. Try loading it on the next clear night and see if you get good pointings. Also make sure C2A and Gemini are consistent on J2000 or Jnow coordinates.
Aug 14, 2013
Have installed new pc164c with 12mm micro-lens, which gets a ~16 degree FOV. It's not flush with up/down/left/right on the scope because it's on the left side of the mount curve for the Orion ShortTube. Got it aligned tonight, and focused. Unfortunately, the camera's 90 deg to the C2A field. Might change that if I get more time to mod a wood block to mount the 1/4x20 on. Also got the main scope refocused. It points very poorly on meridian flip. Needs a new mounta model, and consistency in the J2000 or Jnow setting. Below is the cut/paste from today's Gemini newgroup, on the right procedure for making a new mount model.
This is the most common problem newcomers encounter. The problem is in the sequence you are using. When you do an Additional
Alignment, Gemini assumes you already have your second star centered in the scope. It then computes an error model based on the two
stars you have already entered. The error model goes haywire if you do not already have a new star for your second star.
The correct procedure is as follows:
1. Align Telescope / Goto Bright Star
Select and go to first star and center it
2. Align Telescope / Synchronize
3. Align Telescope / Goto Bright Star
Select and go to next star and center it
4. Align Telescope / Additional Alignment
Repeat steps 3 and 4 for additional alignment stars. Notice you do not select Additional Alignment until after you goto and center
your next star.
Do at least three alignments all on the same side of the meridian before aligning to stars on the other side of the meridian. Do not
flip back and forth on each side of the meridian more than once.
Also make sure that your alignment stars are spread out quite far from each other to minimize errors.
Aug 17, 2013
Had a fine week of getting photos for the CYSI - Astro Camp group. But pointing was terrible. Cause was the scope was somehow off at some point and got rotated when it thought it had CWD, so the RA assumption was all wrong. Solved by making a new mount model from scratch after manually putting the scope in CWD position after parking. That new model took ~3 hrs and has maybe 2 dozen stars from all over the sky. It works well now, with no more meridian flip trouble. It's not perfect, sometimes off by about 1 FOV of the Orion, but it's close. See revised startup procedures for mount model building.
Dec 3, 2013
did new flat fields on Oct 30 after refocusing. They're in the folder \dks under c:\sbig\ccdops5\images. On tue eve Dec 3, it was cold for the first time this season, in the mid 30's. The images of IC 342 showed unfocused stars; possible due to the cold? Anyway, I refocused in the usual way; with jog focus. We shall see if this means we need new flats. Also put the pc164c back into the Orion ShortTube finderscope w/o the Owl 0.5x reducer, which I will now be using on the 10" for asteroid occultations.
Dec 4, 2013
Refocused 12" once again. Spent the night to do Comet Lovejoy. Determined the alt/az of the top of the tallest tree in the northeast hill; it's at Az=75, alt=35 deg. Comet Lovejoy at Az 63 deg was rising at alt 24 deg and stayed left of the tree and hill. Temps got far enough below 32F to allow a cup of water outside to freeze solid throughout. 12" ST2000xcm worked at only 61% to keep temp at -33C. Did new flat fields at dawn; fDec5.st2k is the best.
June 17, 2014
Replaced 0.5x reducer on Orion, but with Highpoint Scientific's version, and focal point (using the Owl "C" adapter) requires an extension tube, not yet gotten. Finished the carpentry on the new Steel security shed. Photo'd Comet PanSTARRS in eve sky. Need to rotate the SBIG to be more directly oriented with the compass, and that'll require new flats. Also need to mount PC164C's with wide angle lenses and figure out how to get both angular directions free to adjust. Baked desiccant a month ago and replace. Works fine now; it had been a problem all during Spring semester.
Aug 25, 2014
Dave McKulle and I unpacked and built the 10" Orion Dob, cleaned optics, and various other tasks.
Sept 14/15, 2014
First clear night in a very long time. Alex at IT had on his own connected up the new Win7 machine to the existing wires from the Scope Room. I was here to test it. I slept at the observatory, and tested the new Win7 computer's connection to the mount, and CCD camera. Seemed to be OK, except when I brought up C2A, it would not connect to the telescope. Wrong COM port? I believe it was trying to connect on COM1, but I recall that this was already taken by another peripheral. Rather than troubleshoot, I instead moved each backplate wire to the old WinXP machine, making sure to connect up the same position. One thing, the WinXP machine and Win7 machine did not have perfectly identical USB connector positions, so there's a possibility they were connected up wrong. WinXP machine was able to talk to the SBIG camera, and the Gemini rainbow software was able to talk to the Gemini and give 'warm restart'. I then started up C2A, and C2A was able to connect to the telescope (on COM4) and show where the telescope was pointing, at the North Pole correctly, and I could right-click and tell the telescope to go somewhere (but it was quite far off). The trouble is - the Rainbow Gemini software desktop console would not operate the mount. I clicked the paddle direction buttons and nothing happened, even when I move the speed to "slew". Connections all seem solid between computer and mount. I don't know the reason.
Orion ShortTube seemed to be in focus, but no idea how well it's pointing.
Frost evident on the CCD chip, so need to bake it again, or maybe buy a new cannister.
Sept 15, 2014
Powered up again, still on old WinXP, and this time Gemini rainbow controls acted normallly. Not sure why this was not true the night before: perhaps I brought up C2A before the Gemini rainbow software, which I know can cause problems.
* Got the wide field original aimed correctly
* The new second wide field does not seem to be giving a star field. Check focus.
* I re-clamped the power and video wires to the wide field cameras, to take gravity tug stress off the cameras.
* I checked the pointing accuracy by calibrating on Alpha Draconis, then sending scope to Vega, which ended up nicely on the CCD chip. Taking it then to Altair, it was off some and needed moving to get it on chip.
* It will function now to take pictures of DSO's next week in class. But then...
Jan 24, 2015
* Haven't logged many nights and projects like I should have, these past 4 months!
* bought new "O" rings for the desiccant plugs, used one for the ST2000xcm in the dome. First use after 1 day, still had frost on the window, but fine since then. Same story with the ST4000xcm, which has been used now at Laguna Mtn earlier this month, for comet imaging.
*
On the 12", the dual video camera idea hasn't worked because one of the video cameras is apparently dead. Verified the power it getting to the second pc164c, and that the video cable displays for the other camera but not for the suspect one. Can only conclude the camera is dead. This can be solved by replacing with the PC164c on the Orion. Today, I replace the Orion ShortTube PC164c with the PC165DNR. Still needs to be focused and oriented properly. Also found that mice, which I've noticed evidence of for a few months now, are really getting out of hand, and triggering the motion sensor in the security system, causing big problems with me and Facilities and the police.
*
I set out traps today, baited with peanut butter.
*
Also cleaned the corrector plate of the 12".
* Also found the f/6.3 Celestron reducer had come loose on the end of the 12" and this is why the camera has oriented skewed some months ago. I tightened it up. Almost certainly needs to be refocused now. The Orion /DNR needs to be focused as well, next work session..
Feb 20, 2015
*
installed focal extender on Orion scope
* installed new nylon adjustment bolts
* centered field on same as wide field and CCD
* big shift on meridian crossing; really need new mount model!
* mag limit is 12.4 for current ~1/3 second integrations or at least 1/3 sec refresh rate by my estimate.
11.anything is very easy for occns.
* tightened up wire harness to avoid catching on the prongs on the mount clamps
And, did the Hispania occultation as a star trail, and took 5x5min shots of Comet Lovejoy
Mar 3, 2015
* Definitely need to do a new mount model on the dome scope ASAP.
* Found the AC PS for the Optec Photometer is putting out only 8.9 v, not the 12V it advertizes on the wallwort. Need to buy new 12VDC PS from SC Electronics perhaps, and then cut/solder on the connector that goes into the photometer female jack. The 9v battery method does not work any more. Not sure why; need to get into in in daylight w/ VOM.
* Found that using the Celestron f/6.3 and nosepiece for mounting the photmeter, that cannot reach focus. Have not yet tried to see if can get the Owl 0.5x into the optical train instead.
* Dave McKulle will bring refurbished 8" f/4 Odyssey next week.
* Desiccant in 12" needs baking again.
* Need to remove moisture from inside 10" tube. Also, there's a bad connection intermittant. Scope wandered off in Dec, and later stopped listening to handpaddle.
* Checked OccultWatcher; Bardecker in NV was a half mile south of me on the track, so if he had a "clear miss", I must have also had a miss.
Losmandy YouTube Page for videos on how to use the mounts etc.
May 15, 2015
* I did a new flat field set in evening twilight on Apr 25, which are good
* On Tue eve May 5 (I think that was it), I was searching for a faint comet with Becky and decided I needed the new C2A which could display the UCAC4 catalog, so right there, mid session, I downloaded the new C2A... and found I could no longer connect to the mount with C2A. Philippe Deverchere, author of C2A, says there's no change to the program in this regard, so it's a mystery why this happened now. I note that I tried a few months ago to switch to the Win7 machine, but also found I could not talk to the mount with C2A. I did no attempts to diagnose or explore, but simply went back to the original WinXP machine and all was well. Problem persists, and I have switched back to the Win7 machine since that'll have to be done soon anyway, given IT's desires.
* The same trouble on the new machine as the old, as far as the temperature no longer being recorded on the image. Probably unrelated.
* Conversing with Deverchere on solving the COM port problem. Termite software installed, which diagnoses COM port connections. Today, I did the following...
-turn on computer win7
-termite on com3, enter 0x06 and get back nothing (mount is not powered up yet)
-turn on pedestal power
-turn on gemini computer at mount and see handpaddle on pedestal light up
-rainbow not on yet
-termite on com3: enter 0x06 and get back 62 23 b#
-termite on com1: enter 0x06 and get back nothing
-fire up c2a
-under 'telescope options', change from com1 to com3
-click 'connect to telescope' and get no error message.
-click 'go to telescope position' which should be the North Pole, but no green bullseye appears anywhere on c2a, which is not what used to happen when things were all working fine
-fire up Gemini.NET and click 'connect' and immediately get error message - "cannot connect to Gemini! Connection failed. Access to COM3 is denied" (now, C2A is still on and set to com3 and -didn't give error message when I tried to connect to telescope, it just didn't give me the bullseye so it's not properly connected in some way. So, port conflict? When things used to work, I'd always have to fire up Gemini.NET first, and THEN c2a or i'd fail. So I will now try to take down C2A.
-shut down c2a
-on Gemini.net, click again 'connect' and this time it succeeds, asking for how to start (usually i do 'warm restart') and on warm restart, it comes back with 'mount connected 8N1 on com3'
-fire up c2a and click 'connect to telescope' and it comes back immediately with 'telescope interface on serial port. unable to open port com3'
in c2a under 'telescope options' I change to com1 and try again to 'connect to telescope' and it comes back with a similar message 'telescope interface on serial port. unable to open port com1'
-on termite for com1, enter 0x06 and it comes back with a blank line
-on termite settings changed to com3, and before I can enter a 0x06 it says "Failed to initialize the port.
Please verify the COM port settings."
-on c2a, setting for com1, after clicking back and forth on the port splitter (always, only the "1" light comes on, never the "2" light), leaving it clicked on the "1" slot, c2a setting it on com1 and then 'connect to telescope' it comes back with " telescope controller interface on serial port. telescope does not answer", which I notice is different than "unable to open com1" as it said before. perhaps the port -splitter was clicked last on com2? I've tried clicking it back and forth during this saga...
On the connections physically: the Gemini hardware computer has a 'rs232' jack into which I have had a phone plug, which goes to the port splitter, and out of the port splitter come two usb lines which both go into the Win7 desktop computer at the back plane. I was not very particular about how to plug these into available usb slots on the back plate. I have not tried moving these around to different physical slots.
June 5, 2015
On new Win7 machine, installed latest ASCOM software and drivers. ASCOM lets multiple controllers act through a single COM port. Set C2A to connect via ASCOM, and now C2A and Gemini.NET both talk to mount on COM3. Deverchere says that the mount model built in Gemini is obeyed by C2A, so should be able to get good pointing. Might need a new model.
June 19, 2015
Becky and Austin joined me at the observatory to use the scope. But, CCDOPS has a problem. You select a guide star, and then tell it to 'self-guide' and it presents a view of the tracking chip, you click on a guide star, and then tell it to 'resume' but the field the little box shows is empty. In exasperation, I got it on M13 globular cluster, thinking it might just be close and I'd see the faint cluster stars. I think maybe I did, but hard to tell. No resolution. Further attempts on a later night had same trouble. I iniated a support request with Diffraction Limited in Canada, which bought out SBIG and they were looking into it. Not very quickly and not much communication, alas.... frustrating. I may have to try and get the old WinXP machine on it.
June 22, 2015
In daylight, I used DriverChecker and updated the drivers, all of which had 2015 dates upon update, and old drivers went back as far as 2008. Have not had a chance to see if that fixes the empty guide box issue. Also made c:\astropix folder and put in all from the old WinXP Spock.
July 2, 2015
Unable to find the Bumgarner mod PC164c videocamera.
Aug 11, 2015
Austin, Gene, and Ann joined me at the observatory, to try and solve the guiderbox problem in CCDOPS. But were unable to even get the COM port connection to the Gemini.NET to happen. After a couple hours of blind alleys, they left, and I almost was ready to seek outside help... till I realized there was one more thing to try - remove the port switcher from the serial line. We didn't use it to connect to Sulu, not for years, and it occured to me that it may not have the proper drivers on the new Win7 machine. It took some grunt work under the floor to remove the port switcher and get enough RS232 line to emerge into the warm room, connect up the serial/USB line and plug into Spock and.... it worked! Now Spock, in Gemini.NET on 'setup', shows COM 1 and COM 4, with COM 4 being the port to the Gemini.NET. Got it going successfully. Then successfully too with C2A through Gemini.NET. We had earlier updated CCDOPS to the latest version which was 5.57 while I had had v5.55 which had been causing the guidebox error. The latest version, with the latest drivers installed - worked! The guidebox now shows the chosen guide star just as it should, and guides on it successfullly. The last thing to check is whether FocusMax will work, but it may involve some work with MaxIm DL/CCD installation first. I've also put in a request for new software money for the latest FocusMax V4 ($149).
Aug 26, 2015
A session at the observatory in the late afternoon and evening, with SA III Becky (and Ezra), to get the 12" scope focused, and test it's connection to the existing FocusMax. Could not get FocusMax to talk to the focuser or MaxIm DLL, but will be purchasing the newest version ASAP. For now, the most effective way to focus is to manually use the electronic focuser. Tried using the SCT big mirror twist focuser, but with the spring-loaded set-bolt, this cannot be done. Successfully refocused, using the electronic focuser activated at the concrete pedestal. Ended at 9:45pm.
(many sessions not logged here, including new flats Sept 22, 2015.
June 1, 2016
FPO came out and removed the tarp from the top of the metal shed and painted the top with some sort of thick gray coating. No rain since, but the El Nino had earlier leaked into the building from holes in the funky roof, causing rust to form on many items due to high humidity and heat
June 24, 2016
Returned from Astro 25 Indian Creek Reservoir trip w/ LX200, and now slips in RA. Probably need to adjust the screw setting the limit on the spring-loaded worm assembly. Must diagnose and repair. Here's a new page I'm putting together with resources for LX200 classic repairs.
July, 2016
Opened up the bottom of the LX200 and tightened the block against the main gear, and insured it moved freely with the manual knob in RA. Seems to point better. However, it is harder to turn manually now that it's tighter.
Aug 29, 2016
Baked the 12" ST2000xcm dessicant for 6 hrs at 375F and replaced into camera
Sept 6, 2016
Did Rogeria occultation during Astro 8A, and while replacing the camera with the diagonal, the telescope went into (slow) runaway mode in RA. Turned it off, and back on, and it flashed red lights as usual, then "Meade", but would not go through nodding and complete initiating.
May be related to tighter feel with RA knob, perhaps it overloaded the motor trying to get off the Watec and replace with the diagonal while it was tracking?
Nov 28, 2016
12" dome scope refuses to point correctly, being off by ~40-50 degrees in RA. Tried zero'ing the mount profile. Didn't help. In fact, the folder holding the profiles was now empty. Strange. Some sort of reboot problem perhaps on Spock by I.T.?? Will take more time to diagnose. Meanwhile, all telescope projects for Astro 8 and 9 are done, fortunately. Will figure it out during Winter Break
Dec 30, 2016
Jay, Benno and I at the observatory to diagnose and fix (hopefully) the 12" scope pointing problem. First hypothesis; perhaps I need to do a 'cold start' rather than a 'warm reboot'. That didn't help. When powering up the paddle on the Gemini, noticed the date and time were wrong, and the longitude and latitude were for Los Angeles. Then we hooked up the GPS during boot-up so it could get good long/lat and time. You have to plug in the GPS to the RS232 port, meaning it must be disconnected from Spock. The RJ11 jack from the GPS Garmin 18 goes into the larger port just below, which is normally empty. Plugging C2A in and on cold boot, and telling it to 'go to' the telescope position, instead of going to the NCP, it went to the Spring Equinox, which of course is NOT where it was actually pointing. Something's screwy. Anyway, I could go on. But here's the final resolution, after we read through the manual online. There is a battery powering the memory inside the Gemini (we have the laste and newest version of the Gemini 1, not a Gemini 2 as I'd thought), and this battery we suspected might have died. I've never replace it and it's been in there for most of a decade. Have to pull it off the mount, take off the small hex-heads screws (6 of them), using a wrench found on the traingle shelf near the scope, and have to muscle and tweek to get the front plate off and reveal the battery - a button Lithium 2354 3V battery. Jay had to drive to Batteries Plus in SV to get a replacement. We re-connected and tried again. Still bad pointing. It was as if the Gemini's internal clock was off. Turns out that we didn't leave the GPS plugged in and ON for long enough. Must be several minutes to get the time string off the satellites properly. The Long and Lat come in pretty fast, but the time does not and you have to wait. That's what we didn't do the first times through this. So, plug in the GPS and leave the power to it "ON" (power comes in from the RJ11 jack). then power off the Gemini 1 and then back on. When it queries the GPS it should get the long/lat/time properly now, and did. Stars were now behind fog, but I told it to go to Alpha Cass and instead of thinking it was off in the East like it had been, it prointed to it properly in the west this time, near as I could tell. Still must build new mount model. Hopefully this will happen tonight Dec 31, weather permitting, when there are two photo-worthy conjunctions to also enjoy: Mars and Neptune only 0.1 degree apart, and the cresent moon and Comet 45P at 7th magnitude, only 3 degrees apart not far away.
Dec 31, 2016
Jay, Benno, Kirk and I photographed the Mars/Neptune conjunction on the dome scope, and the Moon/Comet 45P conjunction outside with the Nikon and Canon cameras. Initial pointing was not too bad, off by several degrees but now 50 degrees like before. We eyeballed in to Mars and would worry about mount-model building later. Afterward the conjunction photography, I built a new Mount-Model, named Dec31-2016.gp
using about 25 or so pointings. The telescope points VERY accurately as long as it's on the same side of the meridian. But the mount-model-building algorithm doesn't seem to do a good job of getting the parameters that determine mirror flop or whatever involves in meridian flipping well. It is still a couple of degrees off when crossing the meridian. After 3 hours of model building I was really cold and tired and quit. The telescope points almost perfectly, as in the star is dead center in the chip, as long as it is on the same side of the meridian. But consistently still off by 2 or 3 degrees when meridian flipping. Would going back and forth many times across the meridian help nail this better? Unknown. Would more frequent uploadings of the model parameters to Gemini help? The documentation and wording onscreen make it unclear exactly what it means to 'upload to Gemini'. Isn't the newly 'add alignment to model' button redetermining the model parameters and making use of them for the next pointing? Or is it instead only helping make the model, but the model isn't actually used in future pointings until it is uploaded to Gemini. Just because this is a bit unclear, I should probably use the crooked arrow and upload to Gemini after every new star pointing. I did that inconsistently last night, and I can't say it hurt anything, and may have helped. I believe the meridan flip aspect was more like 4 or 5 degrees or more early on, and was more like 2 degrees off by the time I quit. Also, I did not "synch on object" on the very first pointing calibration star as I described in the "12 telescope set up" instructions. However, that may be moot because I use C2A to 'calibrate on object' and then hit inside the rainbow VHP 'additional align' to add it to the model on every new calibration pointing.
Unfortunately, I was so tired at the end that I forgot to do one planned action - and that was to bake the dessicant. However, the frosting we saw at the outset yesterday didn't show up tonight 12/31, and perhaps it was because we cooled it slowly, from ambient to 5C, then to 0C and ending at -13C (and forgetting to go colder even though we could have gone a LOT colder.) We had frost trouble yesterday when cooling immediately to -20C as I usually do.
Bake ST2000xcm dessicant plug on next visit.
Mar 12, 2019
Got our first decent night of the semester. The desiccant bake did a good job. No frost on the chip window this time. Re-attached the rope to the new metal pull on the dome slit cover. Set up the 8" Celestron 8SE scope and Astro 8 students on the last of the Hyades occultations of this series, with just the outermost stars getting occulted. Here's some photos...
Spr '20
CoVid Lockdown. No classes here for the next 2, 3 semesters
Jan 11, 2022
COM error on connection of C2A to Losmandy icon. "Telescope does not respond". Then later testing, also COM port intermittant failures from Losmandy icon itself. Sent email to Philippe at C2A but he has not diagnosed yet. Update 9/13/22. He never did respond. Meanwhile...
Mar 8, 2022
COM port errors disappeared! From both Losmandy and C2A. With no further work by me except shaking a bit on the wires in the connecting conduit to warm room. No idea why intermittancy. The connections and hardware all look fine. Baked dessicant but for more like 2 or 2.5 hrs, not longer.
Mar 15, 2022
The COM port issues mysteriously disappeared. But now a new problem. Intermittantly during Tue night's Astro 8A, we had power to the video camera finders go out, simultaneously with the power to the Losmandy. Only to return maybe 30 sec later, and without apparent reason, even if the telescope wasn't moving. There seems some random correlation with playing with the wirings by hand, suggesting a frayed connection. Will try to diagnose with Karl's help on next visit. (failed to find trouble. Then cloudy skies rest of semester).
Sept 13, 2022
First photo night at the Observatory. The COM port issue seems to be due to intermittant power drop outs. I tried spraying with contact cleaner at points into/out of Pyramid power supply. Didn't help. I see no damage to any cables, although I did find a mouse tonight inside the dome room. Unable to catch it, so it's still there. C2A still fails to connect to the Telescope. However, We have two adjacent Pyramid power supplies clamped to the concrete pier; one powers the Kendrick, the other powers the mount. I tried just swapping the 12v plugs so that the equipment is then powered off the other power supply. It seems to have worked! I powered up the Losmandy and then just left it on for 2 hrs while I helped students outdoors. At 10pm, it was still operating, and the software buttons did move the telescope at that time too. If so, we may be able to reliably point to objects and have them track and get photos, even w/o the C2A. However, I will try to get the C2A connection happening by getting contact cleaner and being systematic about cleaning every connection. Meanwhile, I used the on-campus GM8 and GTF81 scope and realized I should have brought the small counterweight. Put it back into your car! The big counterweight is too heavy to work everywhere in the sky. Need an intermediate weight. Took images of Andromeda and M13. Andromeda sky was pretty bright for 30s vs my memory of my old classic from FPO. But likely fixable in Photoshop.
Also baked dessicant and re-installed at end of night. 3hrs at 350F in the dome toaster.
Jan 8, 2024
Kirk Bender and I spent 5 hours. soldering connecting beefier wire to barrel plug wire, to permit the new PC165DNR to be our new wide field camera. Here's how it went:
- took 4 hands to get solder-tinned wire into the poorly designed power recepters on the PC165DNR, and a couple of hours beyond the 3 hours I'd already spent on that task last week
- replaced the PC164C with the PC165DNR in the mount on the scope with the ball joint. We then found we could not get any focus, using the same lens as was on the PC164C, despite all menu experiments. Finally, we replace the lens (12mm f/1.2 lens) with a 4mm f/1.2 lens, and this gave focus.
- Lots of hot pixels, but the PC165DNR has the firmware to do hot pixel removal, which we did successfully. Not yet aligned with the telescope, but this should now go fairly smoothly. The camera shows stars down to 4th or 5th magnitude on this moonless night, and a very wide field, as big as ~2-3 constellations.
- I spread the last bag of salt from the roof onto the poison oak below. 4 other salt bags were spread on the grounds last week
- Also, on the roof I used 2x4" blocks to hold up the dome on the side with the dual-wheel motor whose black drive belt had jumped out of the wheel guides. The cause was that the bolt holding the washer pulling the wheel assembly tight to the dome base, had worked the nut loosed over the years. I found the nut (1/4x20) and a suitable washer and tightened it together as necessary. All good now!
Feb 27, 2024
Will and I worked on the 12" scope while Cade worked with the students on this - our first night at the Observatory this semester. I have learned that in order to make a good mount model, you only hit 'synch' on the first star, and for all additional stars you only hit 'additional align'. So a prime goal was to build a new mount model from scratch. But first, I had Will in the dome while I monitored from the warm room computer. We got the new PC165DNR to align with the telescope, and marked on the TV screen with "O" for Orion finder, and "W" for the new wide field PC165DNR. Next was focus. When I'd left it 1/8/24, the new focuser was cranked all the way in. And we had the extension tube and 2 42mmx10mm rings in addition, to try to match my estimate of the spacing on the older system. But the focus was terrible. When cranked all the way in, it was still not near focus. So I removed one of the spacer rings. Still not enough. I am thinking now I should have removed the other spacer, but I thought it would still not come to focus, so instead we used the Meade primary mirror focus knob. First I loosened the set-bolt to unlock the mirror. We then got it close to focus, and used the new focuser to get the focus perfect. All while it was still aimed at the North Pole. Moving the scope off to the west to synch on a star, we found that the focal plane wasn't quite parallel with the chip. We pulled the SBIG camera and extension tubes off. Will used cleaning fluid and Q-tips to clean the shutter, which looked like it had a bit of smutz on it. We also took out one of the brass screws that looked like it might be tweeking the mating ot the extension tube to the sliding tube on the camera side. This time, the focus now looked uniform across the field. I then followed the procedure I'd laid out in this log, to built a new mount model from scratch. I did about 20 stars on the west side of the meridian, and the pointed pretty well as long as I stayed on that side. Moving to the East side, the pointing was off by several degrees. I then did another dozen stars, then tried going to the west side and again the pointing was off by several degrees. It looks like the software has a hard time adapting to the big shifts across the meridian. At 11pm, I had to quit and I saved the profile as Feb27-2024.gp. I will try addint more stars to it at some point. At least, at this point, the focus was not changing as I shifted across the meridian, like it did the first time this night. I worried it was primary mirror flop, but if it was, it didn't move after the first displacement.
Aug 23, 2024
Astro Dept Fall Meeting. Me and SA II Cade Knorr in attendence. We spent the first hour talking about the needs for the Observatory for Astro 8A and also Astro 9ABC. We had a new camera, a ZWO 855 digital camera, needing a laptop computer to download images. We got the camera connected and browsed for sofware and which could both connect to the camera and also with C2A, our main software for sky display and telescope mount connection. However, the C2A software would, new this semester, not connect to the Gemini II app which runs the motors on the Losmandy G11 mount for the 12" dome telescope. We tried everything; switching COM ports, checking for mouse-chew marks on the 100 yards of data and power wiring I'd rigged to go from dome-room telescope to the warm room "Spock" (our Win7 computer controller). In the end, I had to settle for using the native catalogs for stars and deep sky targets in the Gemini software. It's not ideal, and slows the acquisition of targets during the pressure-packed 3 hour sessions for Astro 8A and for Astro 9ABC. I'll continue to scour the web and "cloudy nights" posts and the Gemini message board, for things to try.
Next was discussing the astronomical event calendar I'd put together for the rest of '24, with asteroid occultations, lunar grazes, eclipsing binary primary eclipses, and also what external events (SJAA and SCAC star parties, and a public evening at the Natural History Museum) Cade and I would want to incorporate into our schedule. There were 3 asteroid occultation events that would occur on Tuesday nights, and one on Wednesday night that I would then want to make as special events for students to help with and demo how scientific data was really taken. How those special nights would be done, the logistics, was worked out, with the special new 8SE telescope purchased, and the replacement VTI from IOTA (the Arduino unit, with the non-standard numerical display, which would be difficult to mate with the Python software we had.
We also trimmed poison oak from around the student "picnic" big table, and from the side of the metal storage shed. Unfortunately, the FP tickets I submitted on this growin problem were not answered, so I had to work on this myself. Cade helped.
Sept 9, 2024
I baked the dessicant and replaced into the ST2000xcm, at home, brought to the Observatory. I never did get the Watec camera to focus on the backend of the LX200. Too long a chain of gear and would likely hit dome sides. Will require changing the main mirror focus knob to get the ST2000xcm to focus not at focus=35, but more like near zero. Then there will be travel available to try to get Watec to focus and not hit dome. Will require another quiet period to see if this is possible. I've re-assembled the SBIG to the LX200 scope and this is the combo of connectors and adapters that got it together. I've not yet tried to get it to focus, as fog ruled last Wednesday when I was with the Astro 9 class demo'ing things and got this put together
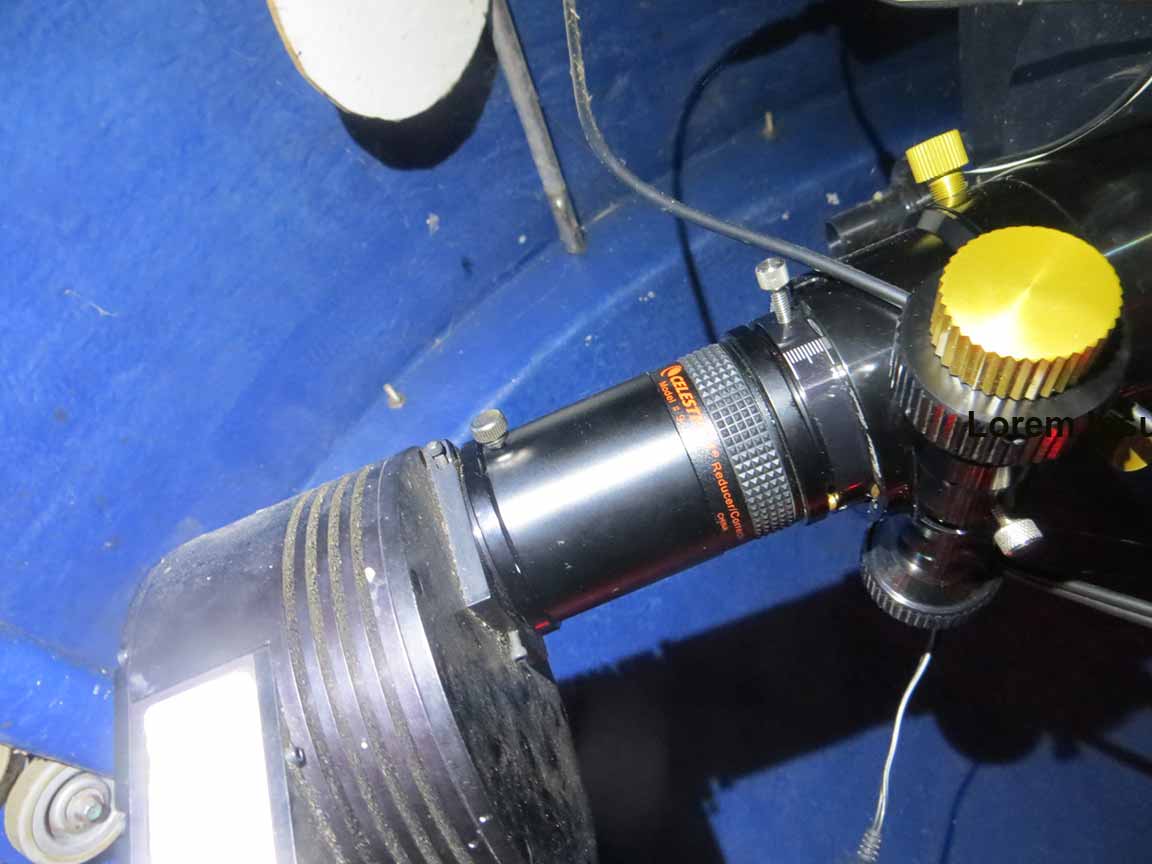 |
Oct 29, 2024
The new optical stack as shown above, seems to give much less in the way of vignetting. The images, and the flat fields done so far show hardly any vignetting, and yet are still about the same angular width. This is good.
I and Cade Knorr pulled off the wide angle camera and the second camera in that home-made mount bolted on the hole at the top of the LX200 OTA. I removed the 2nd wide camera which we have not been using, and the ball mount has been quite unstable and unreliable in clamping and staying pointed correcty. We had to cut off the rope attached to the shutter handle as it was rubbing against the dome base because of its thickness. I replaced it with a bit of AC cord which is just as sturdy but thinner. I'm concerned that the rope or AC cord have been knocking the wide field camera off direction. So, tonight Cade and I removed the dual camera holder plates from the ball mount, and I then removed the 2nd camera (unused) and the ball mount, and instead re-attached the camera holder plate directly to the piece of wood adapting it to the 1/4 x 20 bolt screwing it to the adapter hole in the OTA. The wide field camera is now much closer to the OTA and not susceptible to rubbing against the shutter handle rope on close-down process. It's also pretty bump-proof and points reliably from both sides of a meridian flip. I still need to make a new mount model, but then I'm optimistic we'll be able to get to good pointing accuracy from the Gemini object lists.
The baked desiccant is still holding up. No frost on tonight's images, despite the new cold.
Oct 30, 2024
Ay9ABC night. Bernard volunteers to try to get the Celestron mega mount working, which I'd tested and found would not power up, and did not have the resources to try to remedy. We didn't have particular demand for it - till this rather outstanding Astro 9ABC crew of 2024. I'm surprised and impressed! He and students Cade and Sandy Astone get the electronics diagnosed with our testing gear, clean up the main circuit board, try 15 different (15! Yes, we have lots of 12VDC power "wall worts" around here) and find one that finally works with the board, and get it working! Sufficient to mount the LXD75 Meade Schmidt reflector and then get it working with Nina software.
The G11 mount still needs me to make a new mount model, but not to be done on class nights, where it needs to be put full-on to student projects. We got good images of Comet A3-T-ATLAS, fading but still 5th magnitude, and also the Merope dust nebula in the Plieades of Taurus, and the Ring nebula for Ava.
I stayed late, till after midnight, getting triplets of dark fields since the temperatures were now cold and suitable for -26C and -28C dark frame constructions. They take 20 minutes to do a triplet for median combining, but anyway I wanted to stay to help Bernard H, who has been such a help in loading software for the ZWO camera onto the observatory laptop, and helping get image sets on it, with the new refractor, for students for their processing in the lab, if we ever get a cloudy night.
I also still need to try mounting the Watec camera for occultations. Not yet done.
Nov 29, 2025
Many tasks done in the past year, but not logged here. Sorry! Tonight, my intent was to make a new mount model for the 12" dome scope on Gemini-controlled losmandy G11 mount. I did not yet get that done. But, got great progress on tasks:
1. Added a second 0.5x reducer to the PC165DNR in the Orion Short Tube refractor. The FOV now spans 2deg x 1.8 deg and this makes a big difference in getting targets into the field. The two 0.5x reducers needed to be mounted back-to-back to get focus within our optical chain. The bright stars are bloated, but the dimmer stars all look fine. Limiting magnitude now about 11.0 on a good night, I'd guess, and 10.6 near the moon on this thin cirrus night. I had to use the 0.5x that I've carried inside my OccBox, as the 0.5x I thought was in the Observatory was nowhere to be found.
2. Realized that we have been failing to make communication with C2A and Gemini for a simple reason - you have to bring Gemini completely up FIRST, and only THEN bring up C2A app and ask it to 'connect to telescope'. If C2A is already up, then asking it THEN to 'connect to telescope' won't work. When you power up and if you see C2A is already on, then shut it down and then re-start it, and do this only AFTER you have first fired up Gemini and got it talking to the scope mount properly. Then, you can run things from C2A. I found that the existing mount model made a year ago, actually now works fairly well, even after meridian flip. But meridian flip still does lead to an offset of a degree or so at present.
3. Got the Orion Short tube properly oriented with C2A and CCD Chip when pointing in the East. When pointing in the west, the Orion Shortube field is 180 degree rotated from the C2A field. This will be important for making charts for asteroid events.
Jan 30, 2026
* Work party at Observatory with me, Will, Sandy, Bernard, Annabella (Astro 4), but gate was no-power and had to hike in.
* Diagnosed C11 donation: it needs more than a tweek of the connector. PC connection also gives same symptom of no motion in "up" direction, using different connectors and software. May require Celestron to fix.
* Flashed new 8SE hand controller so now it is alt/az and works with the existing mount at observatory (which will be Jordan's loaner for now, till the mount broken in the hands of Sandy is somehow fixed or sent to Celestron too, later this winter with Bernard.
* Got the Watec to focus on the 12". Focuses with same f/6.3 and extension tube that we use with the ST cameras optical train, but at rack/pinion manual focus =34, not the =17 needed for the ST cameras. I still need to see if I can try all 3 different nosepieces with 0.5x reducer and achieve focus. The FOV is very tiny with the f/6.3 and 12". Stars are bigger than we want I believe. May reduce observability of the faint events I want it to try. Be sure when you swap it in, that you orient it in the "video connector up" rotation to agree with your existing charts. The correct charts should be only 35% as big as the 8SE LCD chart
* Got the ST4000 mounted on the 12" and it does work and interacts with CCDops OK. Until we get our new camera, the ST4000 will be our student set up camera for imaging. But, the desiccant needs to be baked.
* Report from Sandy is the ICC at Cabrillo (Interclub Council) is non-functional and "Don't go to them!" to have their help in starting a new Cabrillo RCASS.
* I believe that the 12" with f/6.3 and my Watec PAL ought to be just the same LCD field as the 8SE but multiplied by (8/12) x (3.3/6.3) although that may prove simplistic. Anyway, that gives a C2A rectangle like this:
Feb 1, 2026
ST4000xcm desiccant t is baking at home at 350F on a bit of aluminum foil to avoid trouble with oils from pans. Baking for many hours and will go back into the camera immediately as soon as it is cooled
Mar 7, 2026
Bernard H, Sandy Astone and I at Observatory.
*
New ZWO ASI2600MCduo camera and its spacers arrived. Got installed on 12", had to move the counter on the mirror knob focuser. Then discovered that in focus with the f/6.3 eclipsed the guide chip! We cannot use the f/6.3 with the new camera, which has a much bigger chip than the ST2000 and the guide chip is very close to the edge of the physical focal plane. Removed the f/6.3 and then it was OK. And had to move the mirror knob back. There's a lot of tuning inside the software, seeing periodic error in guide chase. Bernard says he needs/wants to get all that tuning done before we're ready to have an easier power up and new pix ready to happen. The sensitivity of the camera is very good. A 1-sec photo of M65/66 had both galaxies and spiral structure. 15 minutes should be amazing. Star focus is not perfect but that's in large part due to our crummy atmospherics in the canyon. But will still be better then the 7 micron pixels of ST2000xcm.
* Sandy brought re-made HDD's for Colossus and Sulu and HAL. Physical jumper change on motherboard of Colossus allowed new install of Win10, successful. Internet access will have to happen through "USB Tethering" method, which needs more thought. Spock still have internet. Attempts to Login to Cabrillo Network always fails even with my credentials, but probably because Spock is Win7.
* Instead of using Spock we will now be using the Astro laptop, which needs a name. I'm proposing "Quinto" (after the Spock character in the StarTrek re-boot movies as side kick to Chris Pine's Captain Kirk - Zachary Quinto). Bernard is working on upgrading all the drivers for the software. The laptop is a little slower than he'd like but it works OK.
* More tuning needed. Also need to buy the extension cables and powered USB hub in order to comfortably use Quinto at the desk of the warm room. So, re-installed ST2000xcm at end of night at 1am.
=========================================================================================================================
Projects to do
* build a new mount model before trying to do any occultations! And this time when you go to a new alignment star do NOT hit "synch". ONLY hit "additional align".
* Cut remaining trees interferring with our horizon.
* Test the focus points for the CCD SBIG camera vs the Watec 910hx.
* finish preparing for rapid swap to/from Watec 910hx and ST2000XCM camera on 12"
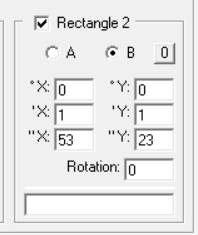