SBIG ST2000XCM CCD Camera / GM8 Mount: Learning Curve
This is a fine camera, and such a pleasant experience compared to the Meade
DSI and it's obtuse software. Of course, it cost ~10 times as much, so maybe
it's not a fair comparison. The 1600x1200 chip is arrayed as 800x600 elements
of 2x2, each with 2 green, a red, and a blue filtered pixel, giving single-shot
color pictures. The chip reads out 16 bits in the SBIG compressed format. So
far, I've used it strictly on the GM8 mount + Megrez flourite APO refractor
at prime focus. The Megrez is another fine piece of workmanship, and gives very
sharp stars when looked at visually.
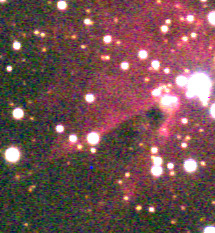
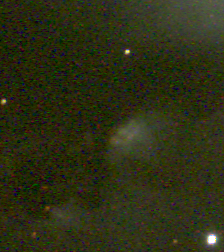
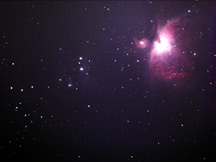 Sept
10, 2005. This is the ST2000xcm's first shot. The Orion nebula
from Carrizo Plain under clean skies. With a full moon and dawn beginning in
the east, this nebula is so bright it still contrasted well enough against the
background sky. 2 minutes, no self-guiding; just free running on whatever polar
alignment I managed to achieve.
Sept
10, 2005. This is the ST2000xcm's first shot. The Orion nebula
from Carrizo Plain under clean skies. With a full moon and dawn beginning in
the east, this nebula is so bright it still contrasted well enough against the
background sky. 2 minutes, no self-guiding; just free running on whatever polar
alignment I managed to achieve.
I focused carefully, but yet I see fat stars. Why were they
so fat even though the focus was good and the image scale was large? The stars
should be tack sharp. Here's the problem I think, the CCDOPS software
will generate single-shot color images, but compresses the 16 bits into 8 bits.
That's only 256 levels. That's 6 magnitudes of surface brightness range - not
enough to cover a moderately bright star and a faint nebula adequately at the
same time. Surely some bright programmer out there will write software to allow
outputting 16 bit TIFF single-shot color pictures? I'll have to ask SBIG why
they did this. I see this in all ST2000XCM pictures on the web. However, it
may be possible to overcome this another way; by stacking short exposures separately
from the grand total, using Photoshop 'layers' command. I need to practice with
this.
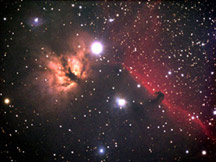 Oct
8, 2005. Next time out... at our Astro 9 photo trip to Mercey
Hot Springs. Clouds wrecked most of the night, but I had time for one good set
of images on the Horsehead / Flame nebula region. It was shot with the SBIG
ST2000XCM: a stack of 4 x 5min images, each dark-subtracted at -30C below ambient.
The final 5min image was in noticable twilight. The frames were single-shot
color processed, then stacked in Registax v.3. Then a low-pass wavelet filter
further smoothed the nebulosity. Finally, the brightness, contrast, and color
saturation was tuned up in Photoshop by Shahram. So, this trip I learned
how to stack images. I focused with some care, but did not put CCDOPS5 into
"planet" mode for focusing.
Oct
8, 2005. Next time out... at our Astro 9 photo trip to Mercey
Hot Springs. Clouds wrecked most of the night, but I had time for one good set
of images on the Horsehead / Flame nebula region. It was shot with the SBIG
ST2000XCM: a stack of 4 x 5min images, each dark-subtracted at -30C below ambient.
The final 5min image was in noticable twilight. The frames were single-shot
color processed, then stacked in Registax v.3. Then a low-pass wavelet filter
further smoothed the nebulosity. Finally, the brightness, contrast, and color
saturation was tuned up in Photoshop by Shahram. So, this trip I learned
how to stack images. I focused with some care, but did not put CCDOPS5 into
"planet" mode for focusing.
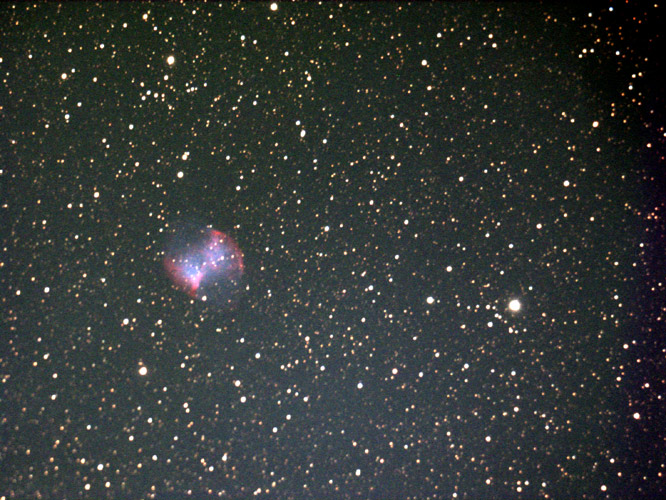
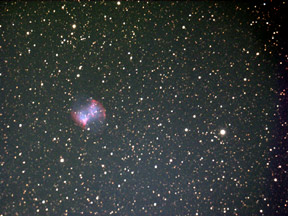 Nov
16 '05 - At the observatory, I mated the Losmandy dovetail plate
to the 8" Meade SN scope. Got it on the GM8 and then put the ST2000XCM
in the eyepiece holder and focused. Found the ST20000XCM nosepiece is
a bit undersized for a 1.25" eyepiece holder, causing it to rock back and
forth even after tightening the thumbscrew(s). And also causing the
focal plane to not be parallel to the
Nov
16 '05 - At the observatory, I mated the Losmandy dovetail plate
to the 8" Meade SN scope. Got it on the GM8 and then put the ST2000XCM
in the eyepiece holder and focused. Found the ST20000XCM nosepiece is
a bit undersized for a 1.25" eyepiece holder, causing it to rock back and
forth even after tightening the thumbscrew(s). And also causing the
focal plane to not be parallel to the  detector.
Got to solve that before more photography. Also found that my idea of attaching
a splitter and having both the hand paddle and the autoguider cable both connected
to the GM8 does not work - the GM8 computer recognizes only one at a time, and
calibration and autoguiding can only be done when the hand paddle is disconnected
altogether. It was a full moon night, and the Dumbell Nebula was only
15-20 degrees up in the west, so the image at left is not bad, all things considered.
5 minutes, converted to jpg but otherwise no post-processing or cropping. The
stars in the lower left corner are out of focus. The blurry stars do not show
radial distribution, but instead seem better explained by the detector not being
parallel to the
detector.
Got to solve that before more photography. Also found that my idea of attaching
a splitter and having both the hand paddle and the autoguider cable both connected
to the GM8 does not work - the GM8 computer recognizes only one at a time, and
calibration and autoguiding can only be done when the hand paddle is disconnected
altogether. It was a full moon night, and the Dumbell Nebula was only
15-20 degrees up in the west, so the image at left is not bad, all things considered.
5 minutes, converted to jpg but otherwise no post-processing or cropping. The
stars in the lower left corner are out of focus. The blurry stars do not show
radial distribution, but instead seem better explained by the detector not being
parallel to the 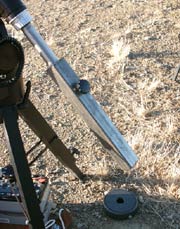 focal
plane. The size of the field here is 0.9x1.5 degrees, for this 8" f/4 =
32" focal length. The limiting magnitude I estimate at 17.
focal
plane. The size of the field here is 0.9x1.5 degrees, for this 8" f/4 =
32" focal length. The limiting magnitude I estimate at 17.
Also, I added "RA" and "Dec" labels to the GM8 motor housings.
A small thing, but it always seems to take 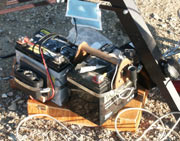 more
mental energy than you might think to plug the cords in correctly. And, I found
this handy piece of iron stock (left) at the local scrap yard, and tapped it
to accept a 1/4-20 knob. It's perfect for a variable lightweight counterweight,
and also protects the threads of the solid stainless steel counterweight shaft.
Finally, since it was well below freezing that night, I decided to use my watercolors
box as insulation against the cold ground for the batteries. I use 12V gel cells
- one for running the laptop, one for running the ST2000XCM, and a small 7.5AH
for running the GM8, which draws little power (the GM8 manual explicitly recommends
not running the GM8 mount with other equipment off the same battery).
more
mental energy than you might think to plug the cords in correctly. And, I found
this handy piece of iron stock (left) at the local scrap yard, and tapped it
to accept a 1/4-20 knob. It's perfect for a variable lightweight counterweight,
and also protects the threads of the solid stainless steel counterweight shaft.
Finally, since it was well below freezing that night, I decided to use my watercolors
box as insulation against the cold ground for the batteries. I use 12V gel cells
- one for running the laptop, one for running the ST2000XCM, and a small 7.5AH
for running the GM8, which draws little power (the GM8 manual explicitly recommends
not running the GM8 mount with other equipment off the same battery).
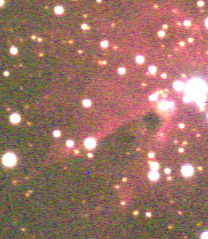
Dec 3, 2005 - Another trip to Carrizo Plain. Clouds
zapped the first 2/3 of the night. It was cold, COLD! The TE cooler hardly had
to work to get to -30C; it was 17F when I started photographing at 1:30am. I
got over an hour of shooting on the Cone Nebula, and planned to do a side-by-side
comparison of the Orion Nebula with ST2000XCM on the Megrez, and then with the
8" LXD75, which has over twice the light-gathering at the same image scale.
But I'd forgotten about the poor mating of the nosepiece to the 8" and
so that comparison will have to wait. At dawn, I spent some time getting a library
of twilight flats. However, even though the flats look basically good, I am
disappointed at the flat fielded versions. Compare these versions of the first
5-minute exposure of the Cone Nebula region, zoomed in to show just the Cone
itself and contrast enhanced...
No flat field
|
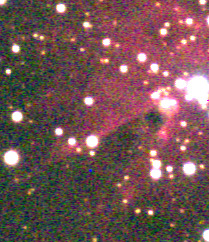
Flat fielded with a single flat |
Flat fielded with average of all 10 flats |
Flat fielding should not only remove vignetting and other large-scale patterns,
it should also reduce the pixel-to-pixel noise due to differing pixel sensitivities.
However, the close-ups above seem to show more noise using a single
flat, and even more (perhaps) when using an average of all 10 flats.
To get the above images, all from the first 5 minute image, I zoomed in on a
small area around the Cone Nebula, single-shot color processed with sRGB+gamma,
imported to Photoshop 7 and adjusted the levels and contrast to look as close
as possible. See below for more insight into flat fields...
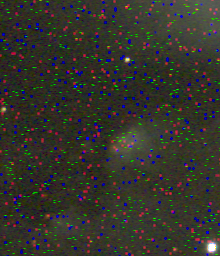
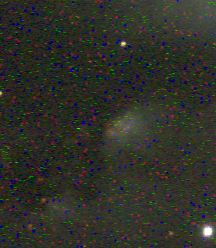
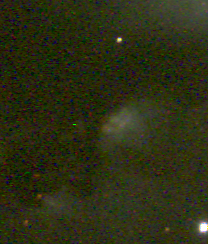
Jan 30, '06. A quick trip up to Coast Rd reservoir and got
some images of the Orion Nebula.
Walking away briefly, the laptop seems to have run out of power, despite having
said it had 4 hours of time left. Strange. I ran it off 120VAC using the inverter.
Meanwhile, the CCD camera was still powered continously from the other battery.
When I tried re-starting CCDOps5, it gave me a bogus error - "error in
USB device. Try reconnecting. If this does not work, replace the device".
Replace the device?! That's a $3,000 camera! After more fiddling, I learned
I have to unplug the power to the camera before communication can resume.
2006 discoveries.
Lost Exposures: First, I've found that it's pretty
predictable to lose ~1 shot per night. WinBlows comes on with a message about
having to close the application yada, yada... Of course, this happens right
as it's beginning to download the time exposure, so you lose the entire exposure.
I don't know why it happens, just typical crap from Microsoft. It's happens
randomly, uncorrelated with anything I've yet discovered. Our Dell laptop has
2BG of memory and a Pentium P4 with plenty of cache and with no other applications
running so seems to me it shouldn't be happening. Anyway, just learn to expect
it. Because of this, I've decided that it doesn't pay to take single long exposures.
The frustration of losing a 10 minute or 15 minute exposure is many times higher
than losing a 5 minute exposure. The additional advantage of building a long
exposure by stacking many shorter ones is that it leave open the ability to
post-process and bring out both the faint and bright areas of the photo. Yet
another advantage is that sometimes you find you need to take more dark frames
because you can't get down to the temperature desired, and it's easier to set
aside time for a 5 minute dark frame or two than for longer darks. So my rule
now is - All exposures are 5-minute exposures. Disk space is
cheap these days.
SBIG says this problem happens because of some sort of periodic checking of
Windows and can be fixed by changing it to 'classic'.
Flat Fields: The problem with the flat field tests above is
just inadequate signal to noise. Flats require much more care and effort than
dark fields. It pays to take great care and invest the time to make quality
flat fields. If you can't, then don't apply them at all. I bought some gray
matte finish art paper and easel and mounted it inside the new storage building.
I then can set up the ST2000xcm with either the Megrez or the camera lenses
and take many images of this gray field. For illumination I use our flourescent
camp light placed at least 20 feet away and close to the perpendicular axis
off the paper, for even illumination. All the other flat field devices I've
found on the web (and made myself) are inferior to this simple solution, in
my opinion. Illuminating from a distance is the cheapest and most effective
way to guarantee even illumination. Then I've taken 3n images, where n is typically
2. Then use CCDOPS ability to median-combine triplets of images until you have
a single final median'd image. The level of the individual frames should be
in the neighborhood of 20k or so. Far enough below the 65k full well capacity
to still be in the linear range, but large enough to minimize shot noise. When
I do this, I get much smoother frames than the darks used in the Cone Nebula
tests last year shown above. When using the ST2000xcm with camera lenses, it
may make a difference what f/ ratio the lens is set to, but the orientation
does not matter since there's no flexure. But when using with the Megrez, the
focal point is so far away that we need not one but two 2" extension tubes
on top of the far end of travel of the draw tube. This produces detectable flexure,
especially when extending the dew shield as I recommend. So, I've assembled
a set of flat fields for the ST2000xcm + Megrez, labelled according to the rotation
angle that the camera is set to at the end of the telescope. If I really wanted
to do it right, I'd expand across a second dimension; the altitude of the target.
But that's very hard to arrange with our flat field setup so I have not done
it. The flat fields in the image files range from an orientation of 90 degrees
to 270 degrees, where 90 degrees has the flat side of the camera facing due
left, and 270 due right, and 180 is straight down. For most subjects not compositionally
requiring strange tilts, the 180 degree setting is the recommended one as it
lets the cables hang straight down. I've tried using the flat fields from the
Megrez on photos using the 8" LXD75. Not a good idea; there's much less
vignetting in the LXD75. Take honest flats with the LXD75.
Bad Connections to RA and/or Dec: This is an increasing problem
with the GM8 mount. The control unit has 6-pin phone-plug connectors going to
the RA and Dec motors. I've noticed that sometimes one or more of the 4 directions
(-RA, +RA, -Dec, +Dec) will not respond to either the hand paddle or to the
autoguider cable. One design flaw (in my opinion) in the GM8 mount is the requirement
that the speed of the motors can only be adjusted at the control unit when the
hand paddle is connected into its phone plug. This requires a lot of swapping
in/out of the hand paddle and the autoguider cable during the night. These don't
go in and out as easily as they should. Result; a lot of strain. Are the connectors
now flaky in their connections? Nov '06 - no, the problem is actually that the
GM8 speed wasn't set high enough. You have to use the 2x speed, not the 0.5x
speed for the Megrez or LXD75. The scope doesn't move far enough to pass whatever
internal limits the software has, and it defaults to "0" movement
on calibration.
Error message: "Shutter Error". Sounds like a mechanical
problem,. I got this error on a fair number of my exposure attempts while at
the observatory. Tried rebooting the computer. Didn't help. Got home and emailed
SBIG - told me it was actually a software issue. I wondered if it was repeated
interrupts from pesky adware, or maybe being connected to the internet (I forgot
to disable the wireless internet and it was connected (weakly?) to the node
off the 12" dome. Once I ran adaware, and disabled the wireless internet,
no more problem.
Dark Subtractions when the exposure lengths don't match. CCDOPS says it can
still do a good dark subtract by just clicking the 'adaptive' button. However,
that is not my experience. Here's an example... each frame below is a 15 minute
image cropped to a small part of M78, single-shot color processed with the default
settings of the sRGB+gamma option, then jpg'd at 100%, with no Photoshop adjustments.
The only differences are the dark subtractions. The chip temperature was set
at -13C. I made a fake 15 minute version of the 10 minute dark frame dk10-13.st4k
by using the 'pixel math' command and multiplying every pixel value by 1.5.
No dark subtraction.
|

Dark subtracted with dk10-13 with 'standard'
option. Clearly better
|
Dark subtracted with dk10-13
with 'adaptive' option. No better than 'standard' option |
Dark subtracted with dk15-30 with 'standard'
option. Much better than using the un-scaled dark.
|
Dark subtracted with dk15-30 with 'adaptive'
option. Not any better than 'standard' option
|
Conclusion - don't trust the 'adaptive' method
to correct for different exposure lengths. You must use the pixel math command
'multiply' to scale the dark to the same time length as the image, if you can't
actually take a dark of the proper exposure length. S/N arguments suggest take
a series of long darks and then cut them back to shorter times as needed.
 Sept
10, 2005. This is the ST2000xcm's first shot. The Orion nebula
from Carrizo Plain under clean skies. With a full moon and dawn beginning in
the east, this nebula is so bright it still contrasted well enough against the
background sky. 2 minutes, no self-guiding; just free running on whatever polar
alignment I managed to achieve.
Sept
10, 2005. This is the ST2000xcm's first shot. The Orion nebula
from Carrizo Plain under clean skies. With a full moon and dawn beginning in
the east, this nebula is so bright it still contrasted well enough against the
background sky. 2 minutes, no self-guiding; just free running on whatever polar
alignment I managed to achieve.

