Photographing the Moon with Your Digital SLR and Telephoto Lens
Let's start with the good news - the moon is a normal daylit scene, so the complex guiding problems you have with doing other astronomical photography are not an issue. You can take a snapshot at a small fraction of a second and not have to guide your camera with the rotation of the Earth. All you need is a good tripod to prevent jitter. Now for the bad news - it's small. Very small. Only 1/2 degree across. So.... "you're gonna need a bigger boat". Or in this case, a bigger lens.
Here is a good on-line calculator to figure your image scale...
On the Route 66 trip, I will be bringing a tripod and 80mm f/6 Megrez APO flourite apochromatic refractor telescope, with a Nikon T-ring for attaching your Nikon camera (unfortunately, this particular setup requires a fixed T-ring and so we will only be able to accomodate Nikon cameras). So that's 6x80=480mm focal length. With a Nikon D40 camera (7.9 micron pixels, 3000 x 2000 pixels sensor size), plugging into the calculator linked above gives an image scale of 3.4 arcseconds per pixel, which is high enough that there will be no problem with atmospheric turbulence degrading the image. The moon is 0.5 degrees or 30 arcmin or 1800 arcsec across. That means the moon will be 530 pixels across, and should be able to handle a digital zoom in photoshop of maybe 2x. You'll see craters, maria, the ray systems of the craters Tycho and Copernicus.
Image Trailing
The Earth rotates about 0.25 degrees per min or 900 arcsec per minute or 15 arcsec of angle per second of time. That means the moon or stars moves across a pixel in 1/4 of a second. Trailing will be completely invisible for exposures less than a half second or so, and your lunar exposures will be more like 1/200 of a second.
The Moon is Dark
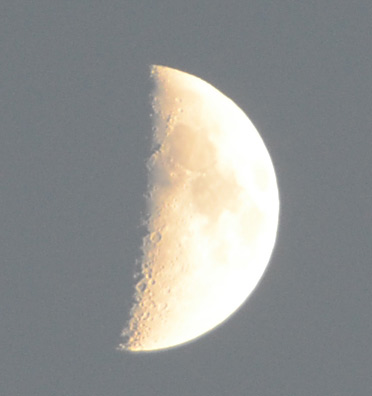
You might be surprised, but the tone of the moon is actually quite dark; about the same as dark lava - reflecting only 6% of the sunlight that falls on it. You will not want it to LOOK dark on your exposures, however, because - we want it to look like it looks! In a black sky, 6% reflected sunlight looks quite bright, of course.
However, another lighting aspect is a bit tougher to deal with - your eye has much more dynamic range than your camera. Looking through the telescope, you can easily see detail on the lunar landscape that is exeriencing high noon, and also the areas nearing sunset. But if you expose for the bright areas, the areas near the terminator (the sunrise or sunset dividing line) will fade to black. It's best to expose for the areas near the terminator, which have the long shadows which give depth. The areas with the sun high overhead will just look variations of gray, with no shadows. Or, you can use Photoshop's layers command and a transition to get both at closer to equal lighting.
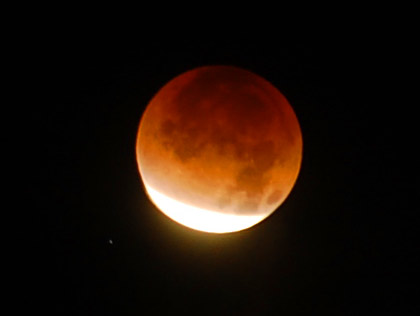
This was shot with a 200mm lens on my Nikon D40, and digitally magnified and sharpened as much as I dared. Most of the blur is because it's a total lunar eclipse and required a 10 second exposure; long enough to show trailing due to the Earth's rotation. Another problem is that most lenses don't have a stop at true infinity, they go a bit beyond. That makes focusing on the stars tough. Outside of eclipse, your exposures will be more like a 1/200 of a second, as a starting point.
|
Focusing
... can be a problem, since the moon is so small. However, it is bright, and if you are using your own long lens, you can try using your autofocus and see if it'll lock on to the lunar limb. The Nikon D300 also has a "live" feature which is very useful. If you are using the 480mm lens I'm bringing, then focus has to be done carefully with the rack-and-pinion focuser (I'll help with that).
Here is a very good website on photographing the moon with a DSLR. The example he shows is a nearly full moon, which will be a good match to what we have for our Route 66 trip in 2012.
Stacking Video of the Moon
If you want to take it to the next level, try using the video option on your DSLR. Take a few hundred frames, the more the better. Then, run it through some free software you can get off the web. For windows machines, I prefer Registax. For Mac's, there's Keith's Image Stacker . This software will select the best, sharpest frames from the total, and then carefully stack them together to make a final averaged image. There's a tutorial here. Here's another, applied to planetary photography, but applies just as well to lunar photography. However, for our particular setup, atmospheric turbulence will be minimal at our image scale. What might not be minimal is vibration through the mounting, and averaging many frames will virtually always increase the signal-to-noise ratio and allow you to get a sharper image that takes digital magnification better. Experiment, give it a try.
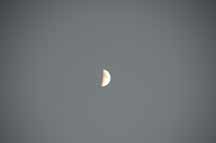
Using 18-200mm zoom on Nikon D7000, no cropping so this is the true scale of the moon on original photo. It was heavily jpg'd and 'save for web' sized so the quality will be better on original image
|

This is the original resolution, cropped to just the moon. Shot in twilight, autofocused on moon. |
|
|
|
On Friday Night, at the Barstow Train Station...
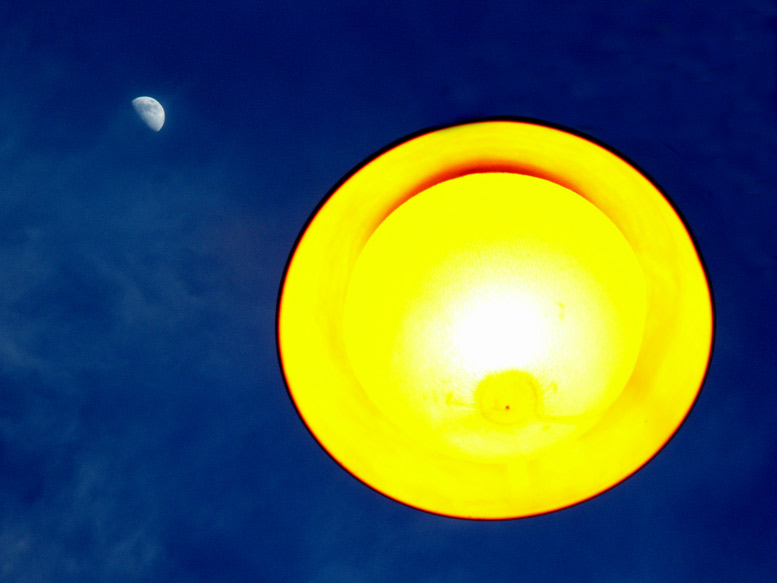
Probably my all-time favorite TV show was The X-Files. I thought about that a few years back on this Route 66 trip when I snapped this shot (post-processed to remove the supports!) of the moon and a spooky flying saucer. Look for it, when you're at the train station on Friday night! The moon will be well placed for your own similar ideas.

Alien Invasion of the Selenites! Taken from the Barstow Train Station
|
Astrophotography of Deep Sky Objects
I teach astrophotography at Cabrillo College. You can see my resources and galleries put together for my students, and student project work. Doing astrophotography of galaxies and nebulae however takes very specialized mounts, telescopes, and auto-guiding camera software and hardware. Fun, but an entirely different adventure than nature photography, and it helps to have deep pockets!
Beautiful Astronomical Events to Photograph in 2012 with DSLR's and Tripod
These events involve bright objects and no specialized astrophotography equipment. Just a tripod and your DSLR. A telephoto will help for some, like the eclipses in particular.
* Mar 14: Brilliant Jupiter and Venus will be in conjunction in the evening sky, 3 degrees apart. A telephoto lens will show the moons of Jupiter as well as brilliant Venus nearby.
* Annular Eclipse of the Sun: May 20 - a very rare event for California, the path for this crosses from the Mendicino area southeast across Lake Tahoe. The moon is a bit too small to completely cover the sun, so at around 6pm you'll see a thin ring of sunlight. Find a great foreground and take dramatic pictures. The eclipse happens on a late Sunday afternoon. See the details here. From Los Angeles, the sun will look like an Arabian Cresent at maximum eclipse.
* Partial Eclipse of the Moon: June 4. 37% of the diameter of the moon will be inside the Earth's shadow at maximum, which is 4:01am in California.
* Transit of Venus: June 6. This is an extremely rare event. There will not be another transit of Venus until the 22nd century. Venus will cross the sun and with a telephoto lens it will be obvious as a big black circle. The transit is still in progress when the sun sets in the west, which is probably when it will be most dramatic to photograph.
* July 1: Venus and Jupiter will both be near the Hayades Star Cluster - the nearest and brightest star cluster in our skies - which also contains the brilliant 1st magnitude red giant star Aldebaren, in the morning sky.
* Aug 14: 3 of the brightest objects in the sky - Saturn, Mars, and the 1st magnitude star Spica in Virgo, will all be within 3 degrees of each other in the early evening sky. Photographed with deep twilight glow, will be memorable.